My First HF Mobile Installation
[edit: 20070114 – I’ve had some questions in email and in comments, I’ll try to take some more photos and answer everyone’s questions.]
I recently finished my first HF mobile installation and while I learned a lot, I learned how much more I still have to learn. Much of my decision-making was based on my theory (hope) that the aluminum shell on my truck would be a better counterpoise than an access door, even with a ground strap from the door to the cab of the truck.
The short version is that I did a lot of planning and measuring before drilling some holes that couldn’t easily be patched to install the antenna and the radio. More details on the planning involved after these photos:
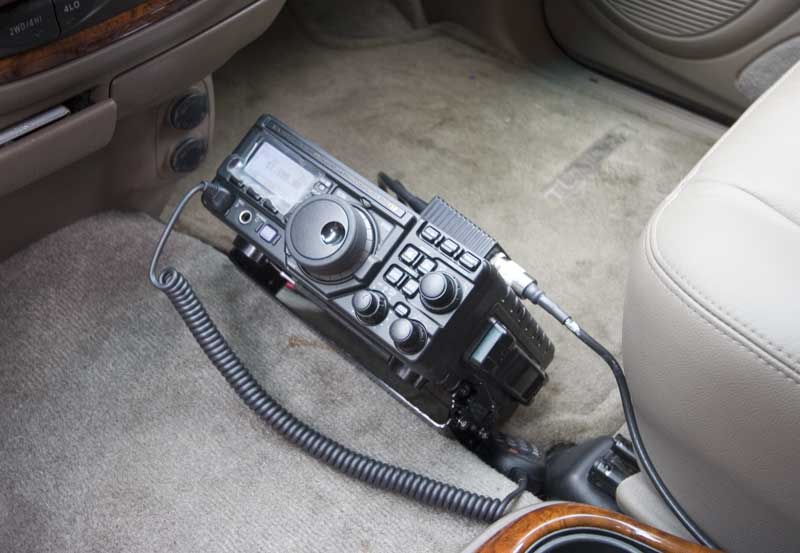
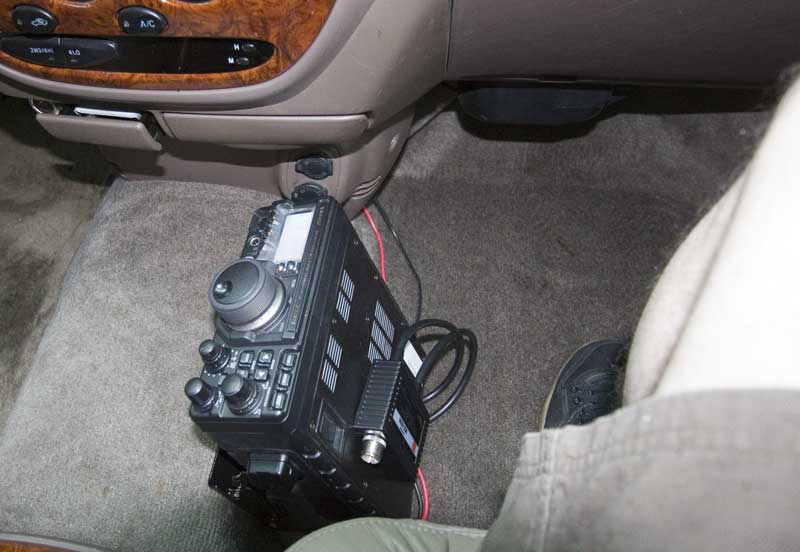
| 897D from the driver’s view | 897D from the passenger’s view |
 |
 |
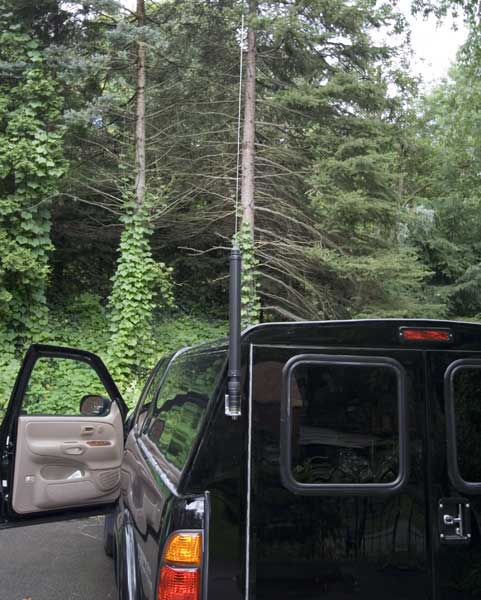
| ATAS-120 from driver’s side rear (I need to take a better picture against a different backdrop) | |
 |
|
Notes on the antenna mount
The antenna mount I used is for putting a CB-radio whip on a rear-view mirror, similar to the “standard three-way mirror mount“. The thru-hole for the antenna base is a tiny bit too small for a SO-239, so I drilled out the L-bracket with an oversize drill bit that cost more than the mount itself. Deciding where to locate the mount was a bit tricky. My requirements were:
- a location as far from the cab as possible so I can drive the antenna at max wattage from the driver’s or passenger’s seat
- keep the antenna vertical
- get the antenna as high off the ground as possible
- no interference with the operation of doors, windows or accessories
- easy to remove and mount elsewhere when I take the shell off to haul large objects
However, my placement restrictions were:
- robust mounting location: the shell’s skin is very thin, so I need to either bolt around an internal strut (with U-bolts) or use a patch of skin very close to struts
- blocking as little of the antenna as possible with the shell
- prefer driver’s side, due to there being fewer tree limbs hitting the vehicle than on the passenger side
I decided to use the rear of the shell on the driver’s side and found a patch of skin near where two struts formed an inverted V. The inside of the shell is bare metal at this location, so I have a decent ground going from the mount thru the bolts to the inside of the bracket. Another thing I like about this location is that it is near the corner so not as much of the signal is blocked by the shell. (Yes, I will take more closeup photos of the mount…)
Notes on the radio mount
The radio mount was pretty straightforward — the 897D is bolted to the transmission tunnel using the stock Yaesu mount. I found a location that allows the display to be seen from both the driver’s and passenger’s seats. One downside of this location is that it is unsafe to operate while driving as you have to turn your head so far away from the road that you lose even peripheral vision of your surroundings. On the other hand, it can be operated from the passenger’s position with little difficulty so you can easily operate while someone else drives.
Future improvements and modifications
There are a few improvements I want to make, but I want to do a few road trips and some work with a field strength meter first. This is my first HF install, and it’s quite possible I’ve fubared all sorts of things that will need fixing before I start tweaking the minor details. I’m pretty certain I’ll need to:
- Replace the RG-8X cable that came with the SO-239 mount with something sturdier and with more shielding. I might go so far as to run grounded EMT under the bed rails then put Andrew Heliax thru the EMT. Hardline thru EMT is probably too expensive for a fixed station running 1KW to a dipole; for a short run in a noisy, dangerous environment, the price differential is minor.
- Make a proper gasket for the antenna lead coming thru the shell. I completely cheaped out on this and used RTV silicone instead of making a grommet out of rubber. What I did works but is embarrassingly ugly.
- Route the antenna line thru the bed and cabin wall instead of thru the windows. Yet another short-term, aggie engineering solution while I sort out the bigger problems.
A few things to consider before doing this yourself
After I finished this first install, I thought to myself, “Damn, I’m glad I have some idea what I’m doing.” There were multiple times where a simple mistake would have caused me to set my carpet on fire, drill holes in the wrong place on a a $2,000 shell, fry my radio or zap my truck’s wiring harness. One of my photography professors used to say that it was as important to know how to fix a mistake as it was to know how to do something in the first place. I think that’s true, but I also think it’s true that one should strive not to make mistakes in the first place. Before you start doing something like this, a few things to remember:
- Make models, or at least test-fit everything before drilling any holes. I used double-sided tape to stick the antenna mount to the outside of the shell then opened the doors to verify that I wouldn’t interfere with door movement.
- Put the radio where you think you want it, then adjust everything in the cabin. I forgot about the 2nd set of cup-holders in the dash that I rarely use and nearly mounted the radio too high for them to be opened.
- Prop up the radio where you want it or have a friend hold it in place, then try to use the radio from a seated driver’s or passenger’s position. Put on your seat-belt, adjust the seat, then look at the display, twiddle the knobs, and otherwise play radio.
- If you don’t have the factory service manual for your vehicle, buy/borrow it while deciding where to mount your radio or antenna. Even with the manual, I still needed to crawl up under the truck and verify that I had clearance for the thru bolts and that there were no wires attached to the transmission tunnel.
- When you decide to drill a hole, think about what will go there when you take the bolt out of the hole. Will you be able to plug the hole? Tape over it? Weld/braze in a slug?
Final thoughts
As I was finishing the install, it occurred to me that I might some day buy an FT-857D that would easily fit in the dash. The holes for the mounting bracket that I carefully drilled thru slits in the carpet to keep the resale value high will be easy to close over simply because I want to move the radio mount. Because I used a common antenna mount with plenty of clearance I can easily replace the ATAS with a VHF tri-band or a single-band HF antenna.
Safety was one of the reasons I went so bolt-and-mount happy on this install. I put a lot of effort into this installation, far more than simply putting a mag-mount on the roof and leaving the transceiver laying on the transmission hump with loose wires running across the carpet. Loose equipment in the cabin can turn a minor panic stop into a minor injury accident or interfere with operation of the vehicle; a loose antenna can cause all sorts of problems for other drivers on the road.
[tags]amateur radio,hf mobile,tundra,yaesu[/tags]
Thanks for your thoughtful overview. Could you share some info/pics/strategy on how to run power from the battery to the rig? What was your strategy for noise filtering? Thanks for taking time to post/share your work with the public domain.
73 DE N7CAV
Comment by Loren B. Cobb, N7CAV — 2007/01/03 @ 11:42